Git 的默认输出是纯文本,diff 里的加减行只有红绿两色,git log 的历史要翻很多屏,PR 操作必须切到浏览器。这三件事都有更顺手的处理方式。

git-delta 解决 diff 显示,lazygit 解决交互操作,gh 解决 GitHub 集成。


git-delta:给 diff 加语法高亮和行号

git-delta 接管 git 的 pager,把原来的纯文本 diff 替换成带语法高亮、行号、可选左右对比视图的界面。

安装

1
2
brew install git-delta
# brew formula 名是 git-delta,不是 delta

配置到 .gitconfig

delta 通过 ~/.gitconfig 生效,不需要改 .zshrc

1
2
3
4
5
6
7
8
9
10
11
12
13
14
15
16
17
18
19
20
21
22
23
24
25
[core]
pager = delta
# 把 delta 设为所有 git 命令的分页器

[interactive]
diffFilter = delta --color-only
# git add -p 等交互式命令用 delta 着色

[delta]
navigate = true
# n/N 在 diff 的文件间跳转
side-by-side = true
# 左右对比视图,适合宽屏;改为 false 则单列显示
line-numbers = true
# 显示行号
syntax-theme = Dracula
# 语法高亮主题,见下方主题选择

[merge]
conflictstyle = diff3
# 合并冲突时显示三方对比(原始/我方/他方)

[diff]
colorMoved = default
# 移动的代码块用特殊颜色标记,不误判为删除+新增

配置完成后,git diffgit showgit log -p 都会自动走 delta。

主题选择

1
2
delta --list-syntax-themes
# 列出所有可用主题,每个会显示示例 diff

暗色系常用:DraculaNordOneHalfDark;亮色系:GitHub。把选好的主题名填进 syntax-theme 字段即可。


lazygit:用 TUI 完成大部分 Git 操作

lazygit 是 git 的终端可视化界面,左侧面板覆盖工作区、分支、提交历史、stash 四大场景,日常 80% 的 Git 操作都可以在里面完成,不需要记参数。

安装

1
brew install lazygit

启动

在任意 git 仓库目录下运行:

1
lazygit

加一个别名到 ~/.zshrc

1
alias lg='lazygit'

界面布局

lazygit页面

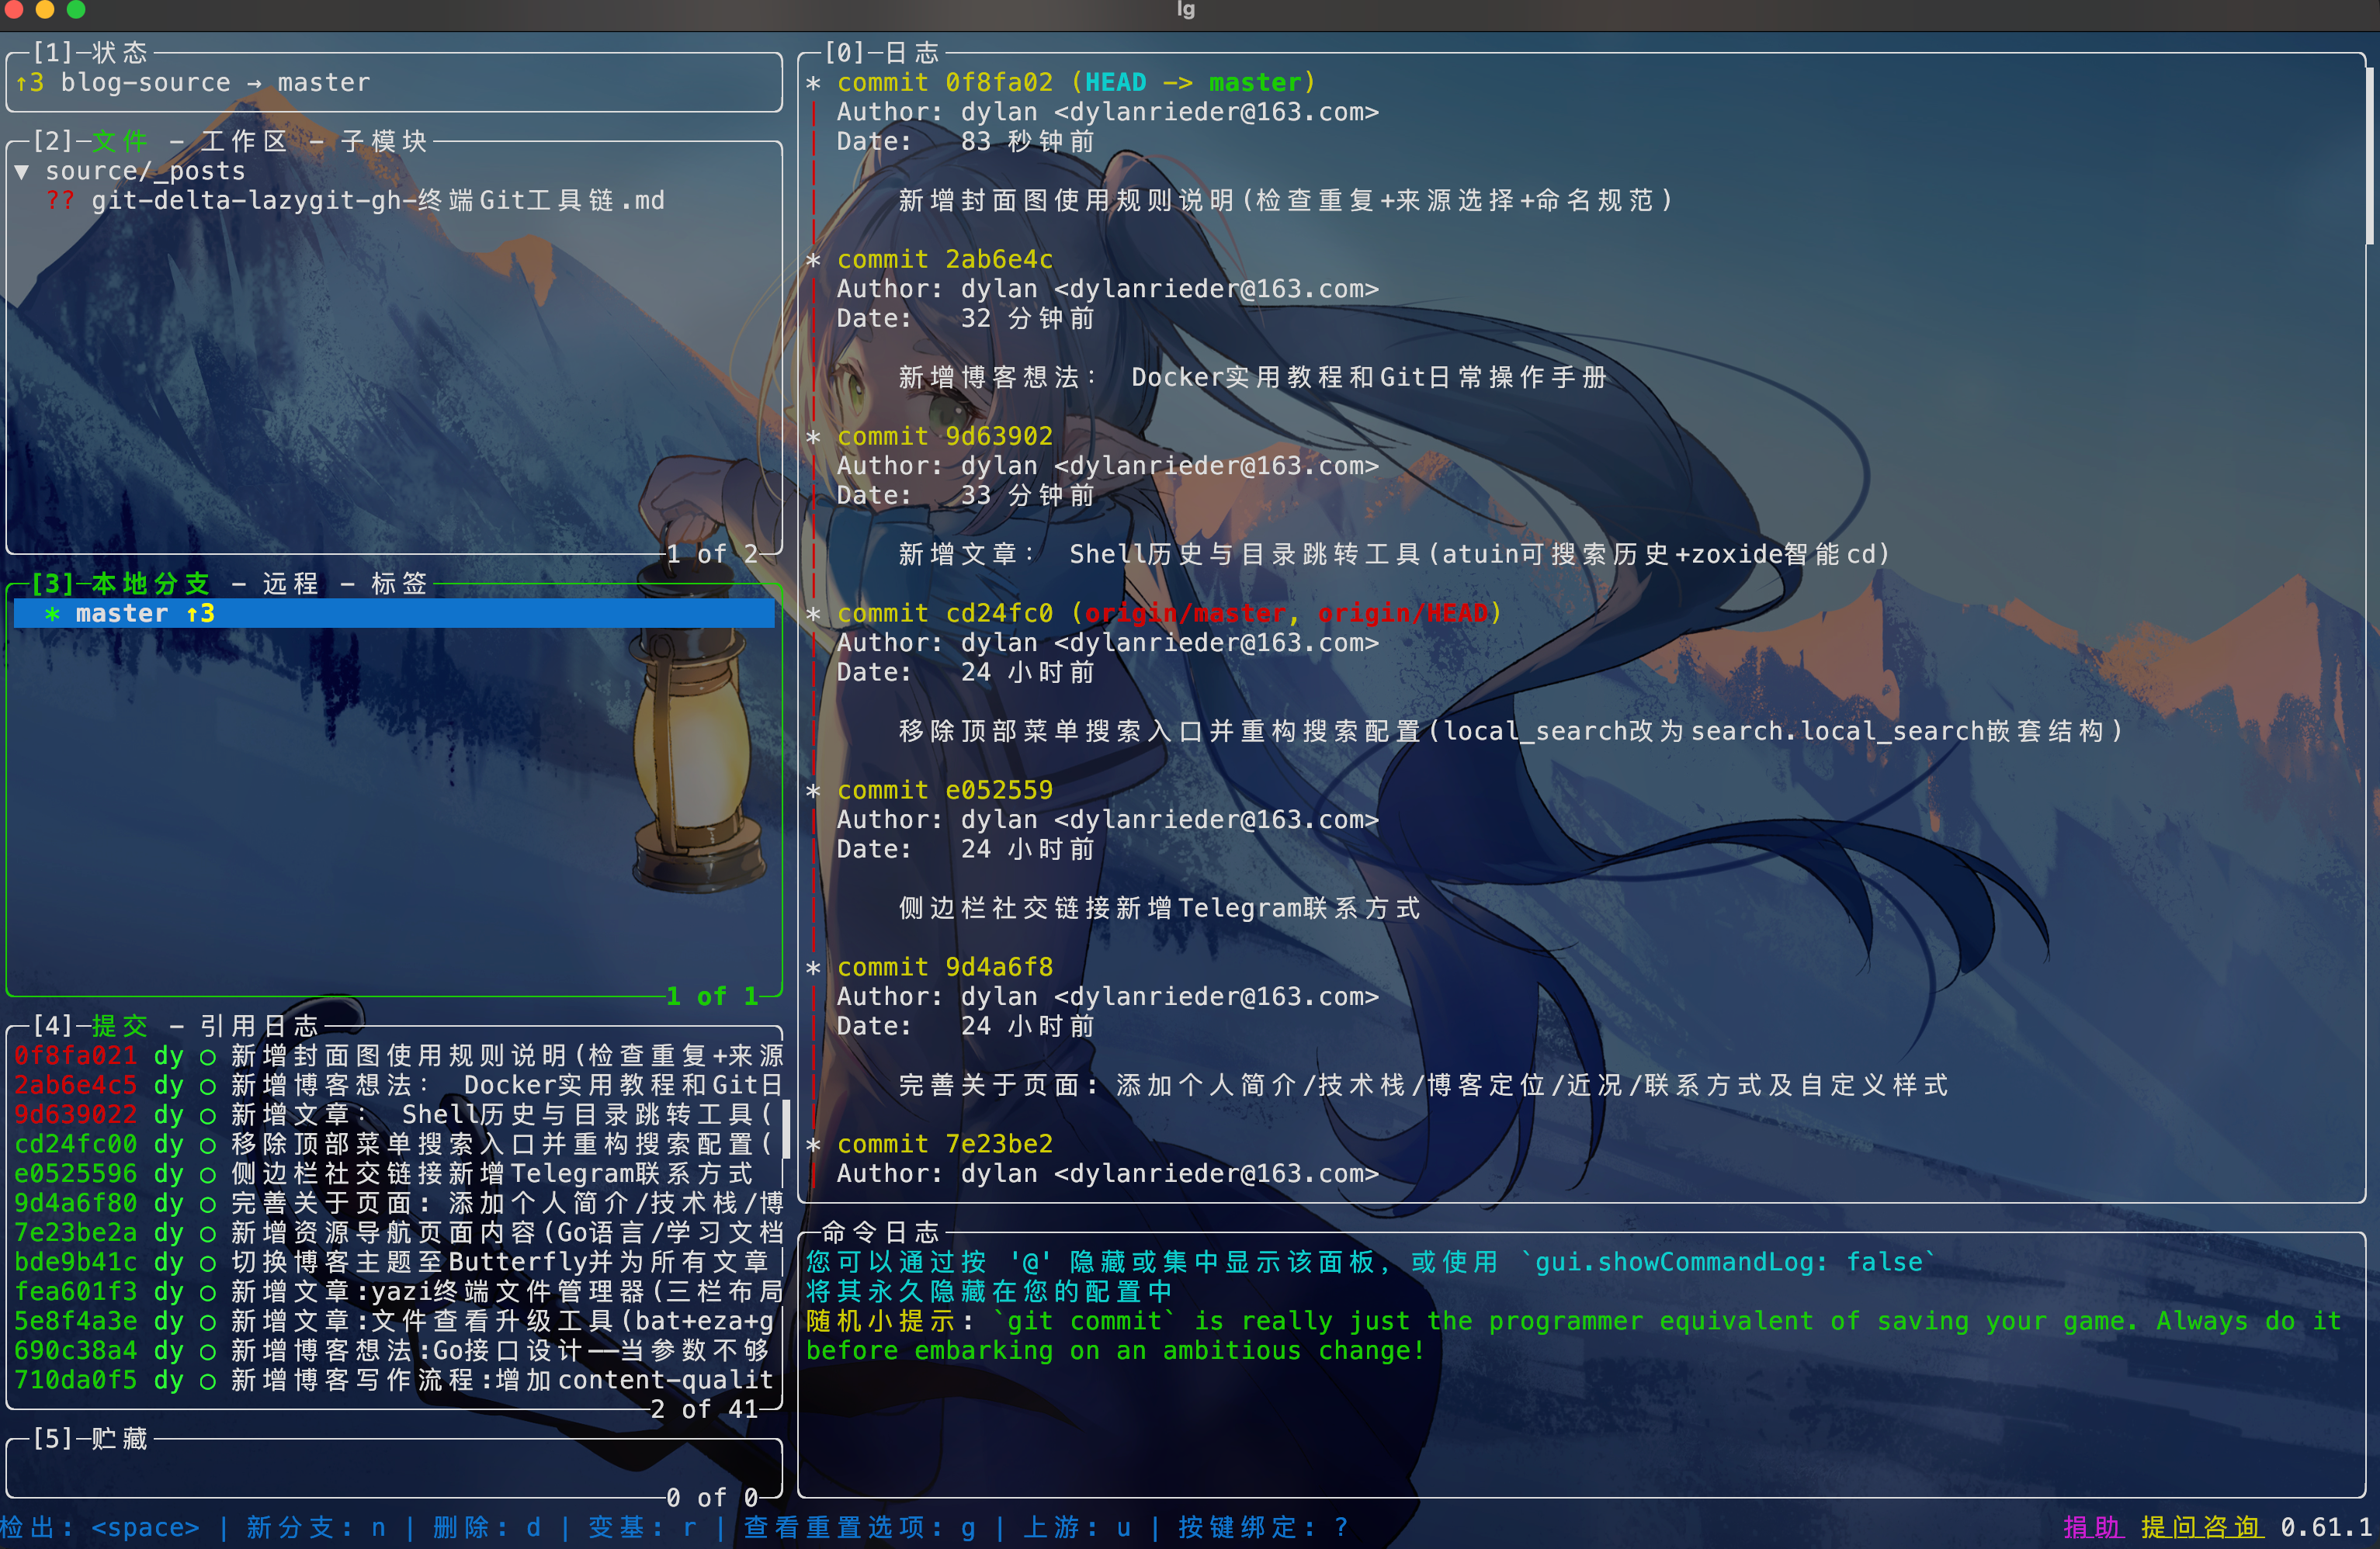
进入 lazygit 后,用 1-5 数字键切换左侧面板,也可以用 h/l 左右移动:

1
2
3
4
5
1 - Status          当前仓库状态
2 - Files 工作区文件变更(最常用)
3 - Local Branches 本地分支
4 - Commits 提交历史
5 - Stash 暂存条目列表

/ 在面板内移动选中项,Enter 进入详情,右侧大窗口实时显示 diff 预览(装了 delta 的话这里也走 delta 渲染)。

核心操作

Stage / Unstage(在 Files 面板):

1
2
Space   对选中文件 stage/unstage(切换)
a 对所有文件 stage/unstage

提交

1
2
3
c       提交(弹出编辑框输入 message
C 用 $EDITOR 写提交信息(适合写多行 message
A 修改上一条提交(amend)

Push / Pull

1
2
P       push 到远程
p pull from 远程

分支操作(在 Branches 面板):

1
2
3
4
5
n       新建分支
Space 切换到选中分支
d 删除本地分支
r rebase 当前分支到选中分支
M merge 选中分支到当前分支

交互式 rebase(在 Commits 面板,选中某条提交后):

1
2
3
4
5
6
e       进入 interactive rebase 模式
d 删除选中提交
s squash 到上一条(保留 message)
f fixup(squash 不保留 message)
[ 把选中提交上移一位
] 把选中提交下移一位

命令行 rebase 需要手动编辑 todo 文件,lazygit 里直接选中拖动,直观很多。

查帮助

1
?       显示当前面板所有快捷键

gh:在终端里操作 GitHub PR 和 Issue

gh 是 GitHub 官方命令行工具,PR 创建/审核/合并、Issue 管理、仓库操作都可以在终端里完成,减少浏览器切换。

安装

1
brew install gh

认证

1
2
gh auth login
# 按提示选择 GitHub.com,HTTPS 协议,通过浏览器完成 OAuth 授权

仓库操作

1
2
3
4
5
gh repo clone owner/repo
# 克隆仓库,自动处理 SSH/HTTPS,不需要完整 URL

gh repo view --web
# 在默认浏览器打开当前仓库的 GitHub 页面

PR 操作

1
2
3
4
5
6
7
8
9
10
11
12
13
14
15
16
17
18
19
20
21
22
23
24
gh pr list
# 列出当前仓库的 PR

gh pr create
# 交互式创建 PR,提示输入 title、body、base branch

gh pr create --title "Fix login redirect" --body "Fixes #42"
# 非交互式创建 PR
# --title:PR 标题
# --body:PR 描述,支持 Markdown
# --web:创建后立即在浏览器打开

gh pr checkout 42
# 切换到第 42 号 PR 对应的分支
# code review 时用这个在本地跑测试

gh pr view 42 --web
# 在浏览器里打开第 42 号 PR

gh pr checks 42
# 查看 PR 的 CI 检查状态(通过/失败/进行中)

gh pr merge 42 --squash
# squash merge,把 PR 里的提交压缩成一条

Issue 操作

1
2
3
4
5
6
7
8
9
10
11
gh issue list
# 列出 issue

gh issue create
# 交互式创建 issue

gh issue view 15
# 查看第 15 号 issue

gh issue close 15
# 关闭 issue

实用组合

1
2
3
4
5
# 列出分配给自己的 PR
gh pr list --assignee @me

# 创建 PR 并直接在浏览器打开(适合需要填写大量描述的情况)
gh pr create --web

.gitconfig 完整配置

1
2
3
4
5
6
7
8
9
10
11
12
13
14
15
16
17
[core]
pager = delta

[interactive]
diffFilter = delta --color-only

[delta]
navigate = true
side-by-side = true
line-numbers = true
syntax-theme = Dracula

[merge]
conflictstyle = diff3

[diff]
colorMoved = default

lazygit 和 gh 不需要额外配置 .gitconfig,装完即用。


从哪里开始

三个工具互相独立,可以按需单独装:

  • git-delta:先装,收益最直接。配置完 .gitconfig 之后跑一次 git log -p,立刻看到区别
  • lazygit:在一个有改动的仓库里启动,先按 ? 看快捷键,把 stage + commit + push 这条主线跑通
  • gh:有 GitHub 工作流的项目里最实用,先用 gh pr listgh pr checkout 熟悉一下,再用 gh pr create 替代浏览器操作

系列前几篇装过的 fzf,lazygit 内部的分支搜索和文件选择会自动调用,不需要额外配置。